|
|
| |
|
|
| |
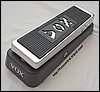
Axis Wah
Over the years, the wah pedal has become one of the most popular and influential of all guitar
effects. Many famous guitar players have used this piece of equipment in their songs...who can forget the opening
of "VooDoo Chile (Slight Return)" or the awesome wah pedal parts of "Machine Gun" both by Jimi Hendrix. All of these
famous guitarists have created a huge demand for the wah pedal...but unfortuntely all is not well in the world of mass
produced wah pedals. The sound of these pedals tends to be...not so great. But fear not, ye tone seekers, for there is
a remedy to your wah pedal ailments...and it won't break your bank account, either!
A couple of years ago I exposed the guts of the famous Vox Clyde McCoy wah pedal for all to see, and even built a clone
of the wonderful pedal, but the problem is that it required the purchase of a replica Halo inductor and a replica of the
ICAR-taper wah pot, which can end up being quite pricey. As a result, I've been working on modifying a Vox V847, that I just
received a few days ago, into an excellent sounding pedal...minus the new inductor and wah pot! That's right! For
this project we're using the original Vox inductor and the original Vox wah pot! You can even use the original
wah pedal circuit board for this project too...but I etched a new one just so I would have a fresh start, and a fresh look.
I'll include the PCB and Layout files for the replacement board if you decide to take that route.
There are really only two major changes being made to the pedal...the addition of true bypass switching and the
addition of an output buffer circuit board, which allows the wah pedal to work in series before a fuzz pedal. The other
changes are all quick and simple resistor and transistor changes, which can be made quickly and easily by using a desoldering braid.
Okay, so the first thing we need to do is to install the DPDT switch for true bypass. If you have a Vox V847 wah, then follow
this diagram, and if you have a new Dunlop Crybaby,
then you will need to follow the directions on this
page since the operation for the Crybaby is a little more complicated with the PCB-mounted jacks. For the Crybaby, I would recommend
that you follow the second set of intructions..."Eliminating Input Buffer." The input buffer will no longer be needed
with true bypass switching. Both of those great true bypass conversions are located on
Stuart Castledine's website, so be sure and check it out! Make a
note that if you wire the bypass switches as shown in those great diagrams, then you may omit the 1M resistor in the input of the circuit
that's shown in the schematic that's shown down the page a little.
The second operation that we'll perform is adding the output buffer circuit to the wah pedal. This step is optional, but I
would certainly add it if you plan to use a fuzz pedal (like a Fuzz Face) in series after the wah pedal. A common problem is that the wah pedal simply won't wah when put in series before a fuzz pedal.
Unfortunately, this is the way it sounds the best to most people. This problem can be solved by adding an output
buffer to the Axis Wah, which won't alter the tone of the pedal. This is a simple JFET buffer that's based
on the Wah Wah project at Tonepad, and can be added to any wah pedal that doesn't have an output buffer, namely the
Vox V847s and the Dunlop Crybabys. The input impedance of this buffer is set by the 1M resistor from the Gate of the
JFET to ground. Since this buffer can give a slight vme boost, so a 100K trimpot is on the output of the buffer to
act as a volume pot so you can keep the volume of the wah pedal at the same level as when it's off. The PCB and Layout for the
output buffer are in the "Project Files" section at the bottom of this page.
|
- First, if you're using the true bypass wiring instructions on Stuart's website, then you can just forget about the
1M input pulldown resistor, but if you're wiring the switch like this, then you'll
need to solder the 1M resistor to the solder side of the circuit board, from the input end of the input resistor to
ground. This resistor will prevent a loud "pop" when the pedal is switched on and off.
- Next we'll replace the 68K input resistor with a 47K resistor. This will give a little volume boost to go along with
the true bypass switching.
- To enhance the mids of the pedal, and to smooth out the bass to treble transition, we'll replace the 1K5 resistor on
the base of Q1 with a 2K2 resistor.
- The next resistor to change is the 470 (or 390 or 510) resistor on the emitter of Q1. Using a lower value will
increase the gain of the pedal, and it will also enhance bass response, which is sometimes a problem with some pickup
configurations. For this change I chose a 330 resistor, which isn't too big and it isn't too small. Using one that's too
small could result in distortion, which we don't want.
- The final resistor change that we'll make to the circuit is the "Q" resistor...the 33K resistor that parallels the
inductor. To help give the wah pedal a more vocal quality, I've chosen a 47K resistor, which isn't quite as
drastic as the 68K that some people use. It's very nice sounding and certainly an improvement over the original 33K.
|
The transistors that come in the Vox V847 and Dunlop Crybaby pedals are the high gain, general purpose
MPSA18. I personally think that these transistors are way too high gain to make a good sounding wah pedal. The toe-down
position is quite ear-piercing and unpleasent. To help make a more mellow wah pedal, I've chosen to use a pair of nice BC109C
transistors that I ordered from Steve Daniels of Small Bear
Electronics a while back. For Q1 I chose a unit with a gain of 400, and for Q2 I chose one with a gain
of 388. The end result was a very nice, a bit more mellow sounding wah that's not as ear-piercing when toe-down, and the
heel-down is still nice and fat...the bass response actually made the springs in my Twin Amp's tube shields rattle!
Below is a schematic of the Axis Wah with all modifications mentioned above.
|
|
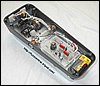
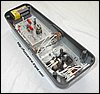
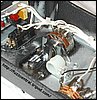
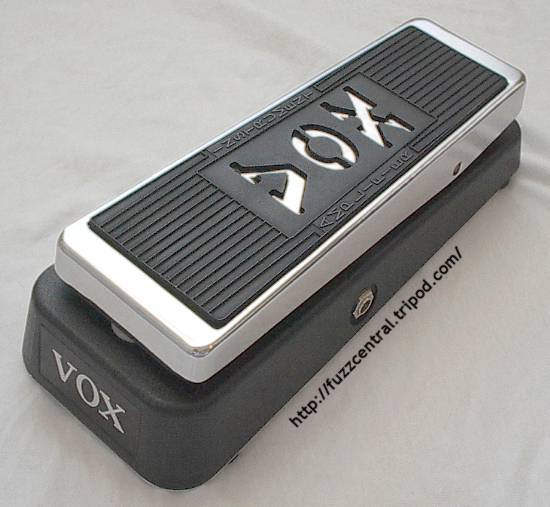
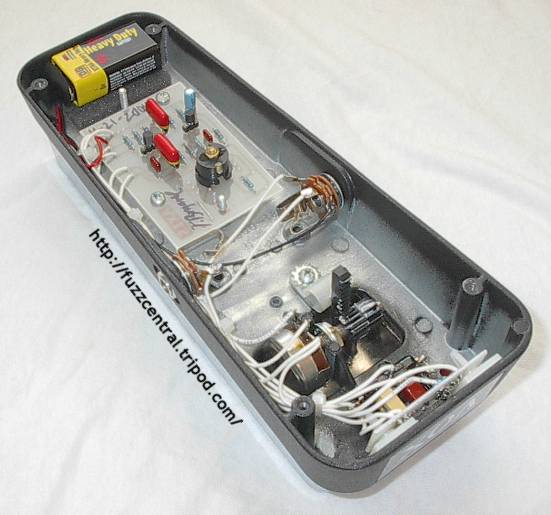
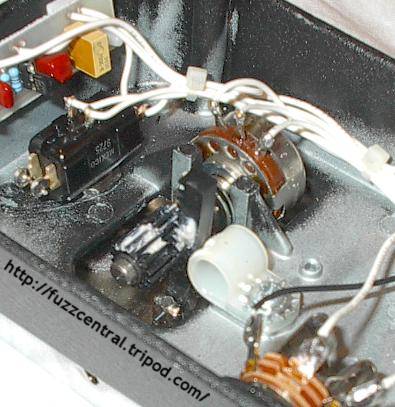
Lastly, here are some pictures of the Axis Wah. Click the thumbnails for the full-sized image! Use your browser's
"Back" button to return to this page.
|
|
|
|
|
Note: These files are NOT to be used in a pedal that you are building for profit. The PCB file is
copyrighted artwork and is subject to a licensing fee.
Axis Wah PCB
|
Here
|
Axis Wah Layout
|
Here
|
Axis Wah Parts List
|
Here
|
Build Difficulty: Moderate
|

|
Output Buffer PCB
|
Here
|
Output Buffer Layout
|
Here
|
Outut Buffer Parts List
|
Here
|
Build Difficulty: Easy
|

|
|
I've included a PCB and Layout for the wah pedal that's the same size as the original Vox V847, but
like I said earlier...you don't need to make a new PCB. All the modifications can be performed on the original board.
I just made this new board mainly so I could make sure that it was the right size and fit since I've been meaning to make
a full-size Vox wah board for a while. This layout will accept the original Vox/Dunlop inductors with 0.3" lead spacing
and it will also accept Stuart Castledine's Halo replicas, with 0.4" lead spacing. However, you will need to make a small PCB for
the output buffer. I mounted mine at the "toe" of the pedal, like in my Clyde McCoy clone. There are several other
locations inside the pedal that you could mount it though.
|
|
|
| |
|
|
|

